Trail Dad - PNW Hikes
  • Home
  • Trip Reports
  • Our Hike Map
  • Outdoor Hacks - Camping | Hiking
  • GIS & Randomness

Hydration Engine Initiation via GeigerRig

8/29/2013

1 Comment

 
Picture
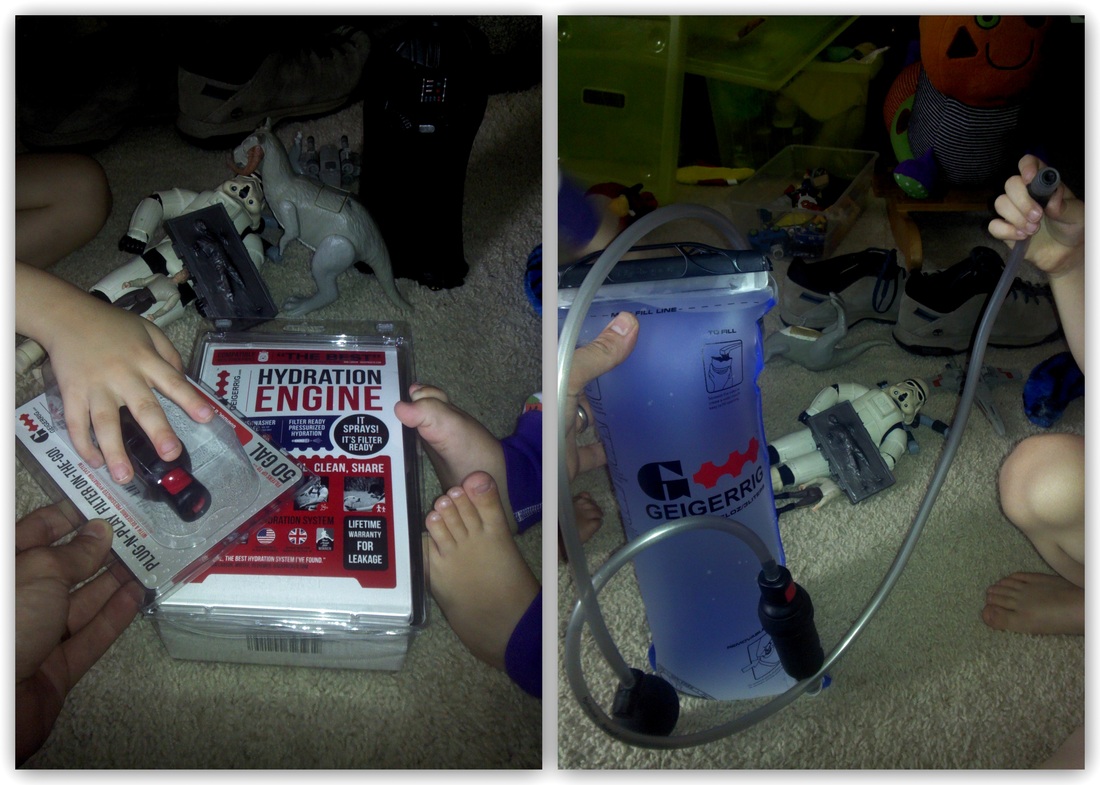
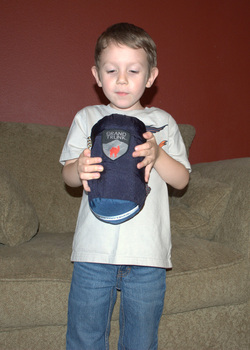
How much does GeigerRig rule the hydration pack world? All the way! The customer service is amazing, both my little children can work the hydration engine out of the package, and it looks durable as can be! Heck, the picture above shows that it can withstand the rugged outdoor adventures on Tatooine and Hoth. Speaking of Star Wars references, the shipping was so fast that I think they are secretly hiding Lightspeed technology.

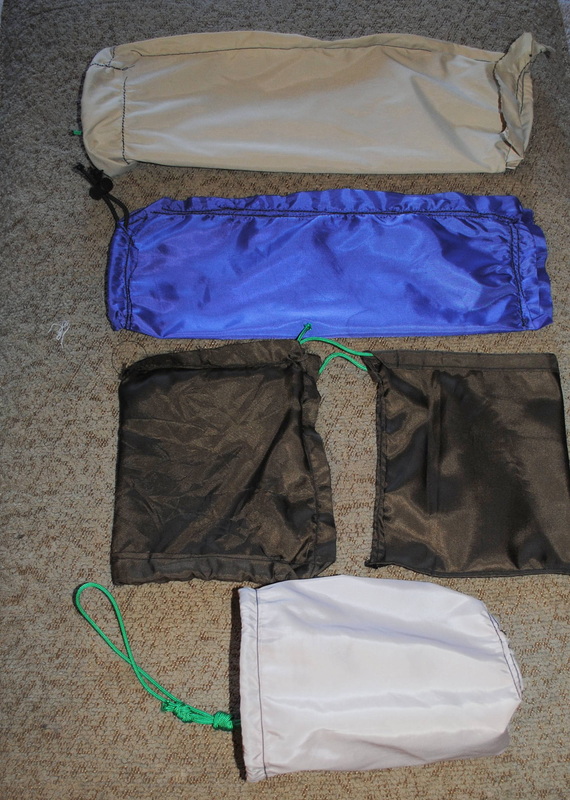
In all seriousness, I lucked out big time this week by winning a giveaway hosted by GeigerRig. Up for grabs was a 3-Liter Geigerrig Hydration Engine (Editor's Choice at Outdoor Gear Lab) and a Geigerrig G4 125 FL Virus Filter. Two days after winning, the box arrived and here I am writing about it.

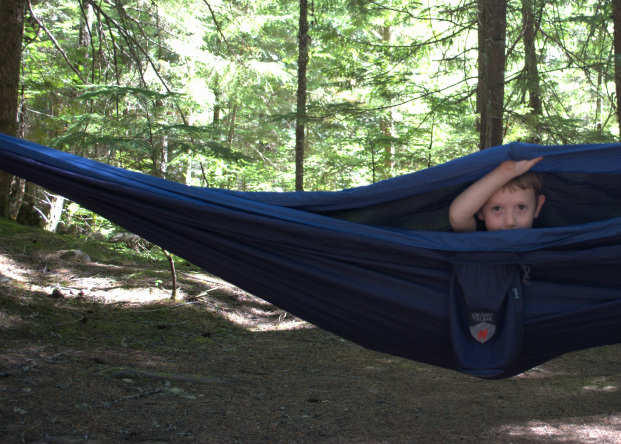
Why am I considering this a hack? Well, my hikes with Trail-Son have been getting much longer (for example, see Whitewater Trail to Jefferson Park or Cascade Head). With him weighing around the 35-pound mark, and my day bag typically around 15-pounds, many of the miles on these hikes are packed with extra weight. Hiking with the wee one is an exercise in carrying the 10+20 essentials, and he is often being carried after we exhaust his four-mile comfortable hiking capability.

While I won't cut out a lot of weight, being able to refuel on water during our hikes in the typically water-copious Pacific Northwest will do wonders. As it stands now, I am the camel carrying the entire hike's supply of water from beginning to whatever is left at the end. 

I have always relied on really basic hydration bladders, so this whole concept of a hydration engine that shoots water straight into a thirsty mouth is a new experience for me. Being able to rely on purification of water that doesn't entail boiling or tetraglycine hydroperiodide is also a new deal for me. At 1.05 ounces for the filter, I am digging the future potential and giddy about the abundant filtering capability per cartridge. 

On that note, thanks again to GeigerRig for helping open up some new vistas for my little hiking family. It may seem like a little thing, but this is really huge for me. I can't wait to test this out in the Oregon mountains, whether on a lengthy day hike or once Trail-Son and I begin backpacking together.
1 Comment

Making Stuff Sacks, a.k.a. Making Your Own Gear (MYOG), or DIY, or Dad Learns to Sew

7/28/2013

0 Comments

 
Picture
My work area for the weekend
Picture
This post is for every person out there who thinks they can't sew, are mechanically-disinclined, or are otherwise craft-blind. Simply put, that is me. I share your non-Etsy pain.

The only time I have sewn anything was by hand, and it was poorly done at that. I'm talking replacing buttons, mending a torn seam, or putting patches of bad metal bands on a denim jacket in the mid-90's. 

Enter 2013. My recent foray into hammock camping brought forth all sorts of research about ways to improve the experience; Again and again, I ran across folks discussing underquilts as the best means for keeping warm when the temperatures drop. I window-shopped online for about ten minutes before realizing that the burgeoning craft industry of underquilt production had me priced out of the market. Don't get me wrong, there are beautiful pieces out there that truly are the work of craftsmen. I just don't have hundreds of dollars to spend on sleeping outside when the temperatures drop down below forty-degrees.

PictureAttempt #1
It was this resignation and running across several stories of MYOG (Make Your Own Gear) success that had my curiosity piqued. I was watching endless loops of YouTube videos, featuring guys of my age, temperament, and recreational kinship whipping out the coolest things from behind a sewing machine, otherwise affectionately known as a "thread injector" or "fabric welder." I can't say that I'll ever refer to it as anything but a sewing machine, but the nicknames crack me up. 

Luckily, Trail-Wife was willing to lend me her sewing machine as long as I didn't refer to it as any of the aforementioned synonyms, so I didn't need to worry about spending any dough on that part.

On Friday night, I picked up Trail-Son after work and we hit the town for nylon remnants, some polyester thread, and sewing needles. We managed to find a decent amount of cheap nylon (some coated, some not), picking up 8 yards to start with. All told, we escaped the store after spending only twenty-three bucks. I figured making five stuff sacks out of this would be a break-even, with anything else being gravy.

PictureAttempt #2
After getting the little guy to bed, I struggled, and I mean I struggled hard. I did not know the difference between a presser foot and a bobbin. I was glued to the manual, and even that wasn't helping. I finally managed to thread the damned thing in a way that at least made some kind of sense. There was quite the rousing feeling of success that came from spinning the hand wheel toward me and catching both lengths of thread.

The best part of the night came up when I started trimming pieces of fabric using my soldering gun; The trimmed nylon had no fraying, and it really was an interesting marriage of trades. Everything was great until Trail-Wife complained about the burning smell. I can't blame her!

PictureAttempt #3
Once I had some samples trimmed up, it was time to go toe-to-toe with the machine. Three hours of fumbling, bumbling, and minor successes later, I had my first stuff sack constructed. 

Lessons learned from the first night: 

Bobbin tension is really important, especially with thicker thread. 

Lowering the presser foot before cracking out some stitches is kind of vital. 

After causing so many jams, I can disassemble and reassemble the bobbin case assembly with my eyes closed.


PictureAttempt #4
The end result was functional, but ugly as sin. I've seen straighter lines on Oregon's highways to the coastline.

The second round of my sewing initiation came Saturday evening. This time, I managed to put together one stuff sack that looks like a wine bag and one that was actually halfway-decent, albeit on the smaller side. I struggled much less with the jamming, and could actually focus a little more on what I was doing.

By the time the end of the weekend hit, I was starting to hit my newbie stride. With a baby on my lap, I managed to pump out two more sacks. I was now in the world of using pins to create better seams, and my final attempt was fairly successful at creating a flat-bottomed stuff sack.  

PictureAttempt #5
That last one even led to some creativity from tips I picked up along the way. In lieu of a cord lock, I went for a combination Figure-8 for one loop, and a triple fisherman's knot with doubled-up cord to provide the closure needed. It works like a charm, and provides an awesome pair of bunny ears when closed that can be looped together and clipped right to my bag.

Lastly, I took one of the triangles I clipped off the bottom and sewed that atop the seam below the draw cord to provide extra reinforcement. It's tough!

I keep looking at this last stuff sack, feeling some major pride. It took an entire weekend, but I am stoked about the next projects. This was an intimidating endeavour, but a new passion has sprung from the experience. Stuff sacks now (and maybe for a few weeks), and eventually an underquilt and beyond.

I want to thank everyone who gave me encouragement and advice during the past 72 hours. Also, a major debt of gratitude goes to the folks who have posted reams of great advice or helpful videos online. Here are some of the ones that really helped me out:

Eric Hudgens' Site and YouTube Channel (cwhammocks)

Hammock Forums

Make Your Own Gear: Five Yards to SuperUltraLight Part 2, Stuff Sack (BackpackingLight)

Make Your Own Waterproof Stuff Sack

DIY Double-Sided Stuff Sack (The Ultimate Hang)

MYOG Stuff Sack (Hiking In Finland)

Simple Stuff Sack Pattern (Bushcraft USA)

Make Your Own Silnylon Stuffsacks (Thru-Hiker.com)

DIY Stuff Sack (Hiker Nerd)

Picture
Flipping them inside-out really is the visual tale of a learning curve.
0 Comments

Grand Trunk Parachute Nylon Double Hammock Review

7/22/2013

0 Comments

 
Picture
Trail-Son refusing to leave the comfort of the Grand Trunk Double Parachute Nylon Hammock
PictureHammock in the mail!
In celebration of National Hammock Day, it is my absolute pleasure to present a review of the Grand Trunk Parachute Nylon Double Hammock. After testing, the use of this hammock has officially become one of my favorite camping hacks, replacing my tent and its accoutrements when the conditions are right.

Over the past year, I have read many accounts of people's experiences using hammocks in lieu of tents. There was a grand amount of appeal behind using an age-old sleeping device modernized with present-day materials and techniques. Hesitation in taking the plunge with Trail-Son around was something that kept me relying on a tent and an air mattress. By virtue of good fortune, I was blessed with an opportunity bestowed by Grand Trunk to review a hammock, putting my anticipation and reservations to the test.

This particular hammock is loaded with impressive features right out of the gate, all of which fared extremely well in comparison with other makes and models. While it starts its hammock life in a tiny stuff pack that weighs in at twenty ounces, it transforms into a very respectable hammock that spans 10.5 feet x 6.5 feet and is capable of holding 400 pounds. Upon close inspection, the seams are triple-stitched and looked great across the entire hammock. As a bonus (particularly for those of us in wetter climates), the material is mildew-resistant.

Two nautical-grade carabiners, a pair of knotted rope loops, and a small instruction card were also tucked inside with the hammock. Each knotted rope loop is about four feet in usable length, each strand being 1/4" in diameter. The included rope and hanging instructions were concise and well-illustrated.

PictureTorturing Trail-Son with a late-night photograph
In putting it to the test, my son and I went camping in the Willamette National Forest of Oregon. After settling in on a site, one of my first orders of business was getting the hammock hung up. I was out checking the lengths between trees, and finding out quickly that the two best vertical candidates were about three feet wider apart than my included gear would have dealt with. Part of the catch was the lack of smaller trees, as the site was filled with trunks that were at least three feet in diameter. For giggles, I did set up the hammock with one end secured to the rack atop my Subaru Outback, and that actually worked like a charm!

While happy about being able to use the car as an impromptu hammock stand, my sights for sleeping were elsewhere. With a little bit of length extension via paracord and some old knot skills, I spanned the length that eluded me earlier. I am a little paranoid about the potential impact that hammock tension has on a tree's cambium, so in the absence of TreeSlings, I made sure that the anchor points had a wide distribution.

It sounds like a lot to get a hammock up, but only five minutes had passed! I would have still been trying to straighten out tent poles had I gone that route.

After testing the hammock out with my own weight, Trail-Son was all about climbing in. He was up there in no time, swaying around, and loving how it felt when he began to lay down. This is a child that does not nap, and I was having trouble getting him up!!!

Once evening came around, we set up our sleeping arrangement in the hammock as follows:

  • An old, thick Mexican blanket was spread out on the bottom of the hammock as our insulating layer
  • Two cheap 30° F sleeping bags were zipped together to accommodate both of us 
  • We're both heavily dependent on pillows, so a Tempur-Pedic pillow made its way with us (obviously car camping)

The low temperature that evening was 52 °F, with the full range of temperatures that evening and into the morning seen below.

Picture
Weather History for Marion Forks, Oregon on Friday, July 20, 2013
With temperature under control, my big litmus test for a successful experience was gauging the comfort level of sleeping in a hammock alongside a four-year-old (or rabid wolverine). I can't believe it shook out this way, but neither of us fully woke up between bedtime and 9 o'clock the next morning. I felt both of us twist around a couple of times, but not once was it an event that truly disturbed our sleep.   

Waking up the next morning brought forth one of the greatest feelings I've had after a night in the woods; No aches, no pains, no stiffness. This is something that I can't say I've ever accomplished, even in my greatest attempts at glamping with an air mattress and extra padding. 

This was pure win. We broke down camp in minutes, felt great, and were on our way to the trails. I foresee many more hammock-filled evenings in our future.

Disclosure of Material Connection: I received a Parachute Nylon Double Hammock for free from Grand Trunk as coordinated by Deep Creek PR an Outdoor Industry Public Relations Company in consideration for review publication.
Picture
Grand Trunk Double Parachute Nylon Hammock, with the ingenious attached stuff pack that doubles as a nighttime catch all

Related Resources

Parachute Nylon Double Hammock (Grand Trunk Goods for the Road)

Gear Test, Portable Hammocks (New York Times)

Customer Reviews (Amazon.com)

Grand Trunk Double Hammock Hangs Tough (Doug Bardwell)

Grand Trunk Goods Double Hammock & Tree Sling Kit Gear Review (OutdoorTrailGear.com)

Grand Trunk Single/Double Hammock Review (Black Scout Survival)

Tips on Hammock Camping with Kids (The Ultimate Hang)

Hammock Forums
0 Comments

Cheese

7/21/2013

3 Comments

 
Picture
Image courtesy of Backpacker Magazine
Picture
Cheese. I love it, and am rarely out in the wilderness without some form of it. Trail-Son has taken on my affinity, but he's not a huge fan of the oily, limp Tillamook cheddar cheese that comes out of my pack after a hot day of trekking. Between his pickiness around the lack of the cheese's integrity and the absence of a nearby frommelier, I resorted to online research to investigate our other options (especially after a disastrous semi-soft Havarti incident during our last camping trip).

In researching which cheeses are the best for varying trips, I came across one of the most brilliant hacks courtesy of Backpacker Magazine. One part Edam cheese wax coating, one part improvised wick (napkin, toilet paper, etc.), and you have yourself a candle/firestarter and a bellyful of yummy Dutch cheese.

Outside of getting creative with fire, here are some thoughts around those cheeses and tricks that garnered the most accolades during my brief research.

Gouda 
Pecorino
Parmigiano Reggiano
Montgomery's Cheddar
Gruyere
Hoch Ybrig
Toussaint
Appenzeller

Wrapping cheese tightly in plastic is the big no-no; The wizard of cooking, Harold McGee, touts three very logical reasons behind this - Tight plastic wrapping promotes non-cheese bacterial growth, prevents dissipation of natural off odors, and can taint the cheese with the flavor of the plastic.

Opinions are mixed otherwise, but for those of us too cheap to invest in cheese paper, the combination of parchment paper or foil-wrapped chunks of cheese stored in an unsealed plastic baggie seems like a win for the trail or campsite. 

If you have any recommendations, please share in the comments!

3 Comments

    Trail-Dad's Hacks

    Tips and tricks that have made my family's life a little easier, more fun, or just more cool while enjoying the outdoors. 

    Just like parenting advice, everyone's mileage may vary.

    Archives

    August 2013
    July 2013

    Categories

    All
    Camping Hack
    Food Hack
    Hiking Hack

    RSS Feed

Powered by Create your own unique website with customizable templates.